SolusVM is popular VPS hosting control panel and SolusVM Primary is used for controlling Secondary node (Servers) and managing VPSs.
Requirements: Fresh CentOS 7 Installed on your VPS/Server.
How to Install SolusVM Primary
Step 1: Login to your root account via SSH and run these two commands:
wget https://files.soluslabs.com/install.sh
sh install.sh
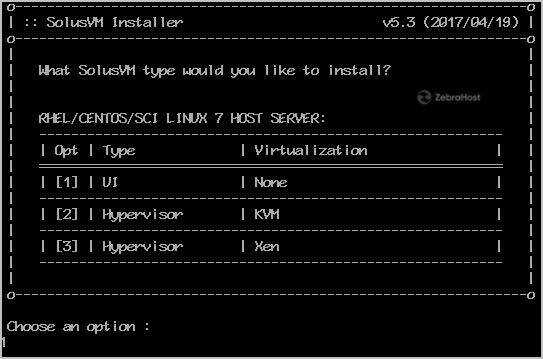
Then, it will display an option, allowing you to choose virtualization. Since we are going to install SolusVM Primary, we will choose option 1.
Enter 1 and press Enter.
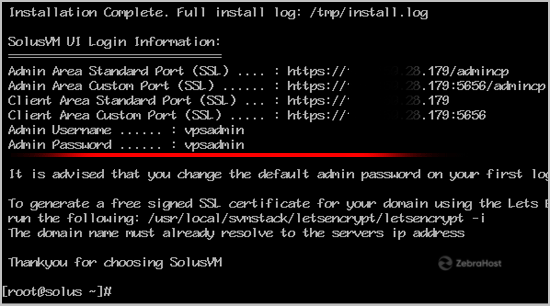
Once the installation is complete, it will show you an admin URL an the Username/Password for your account.
Step 2: You can now access your Admin control panel. Open your SolusVM Admin URL in the browser and enter your login details.
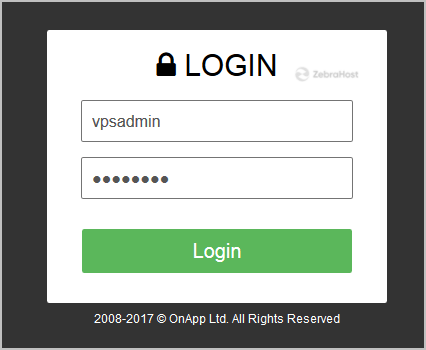
Don’t forget to change your default username and password for SolusVM. The default usernames/passwords are not secure and its easy for anyone to access your panel with them.